Data Conveyer Tutorial
Lesson 1: Convert CSV to Keywords
In the first lesson of this Tutorial, we will create a simple console application that converts a comma delimited file into a keyword file. The lesson is expected to take about 10 minutes.
Step 1.1 Start Visual Studio.
Step 1.2 Select File → New → Project (Ctrl+Shift+N).
Step 1.3 In the New Project dialog box, select Console App (.NET Framework) for .NET Framework 4.5 and enter the project Name, e.g. DataConveyer_tutorial:
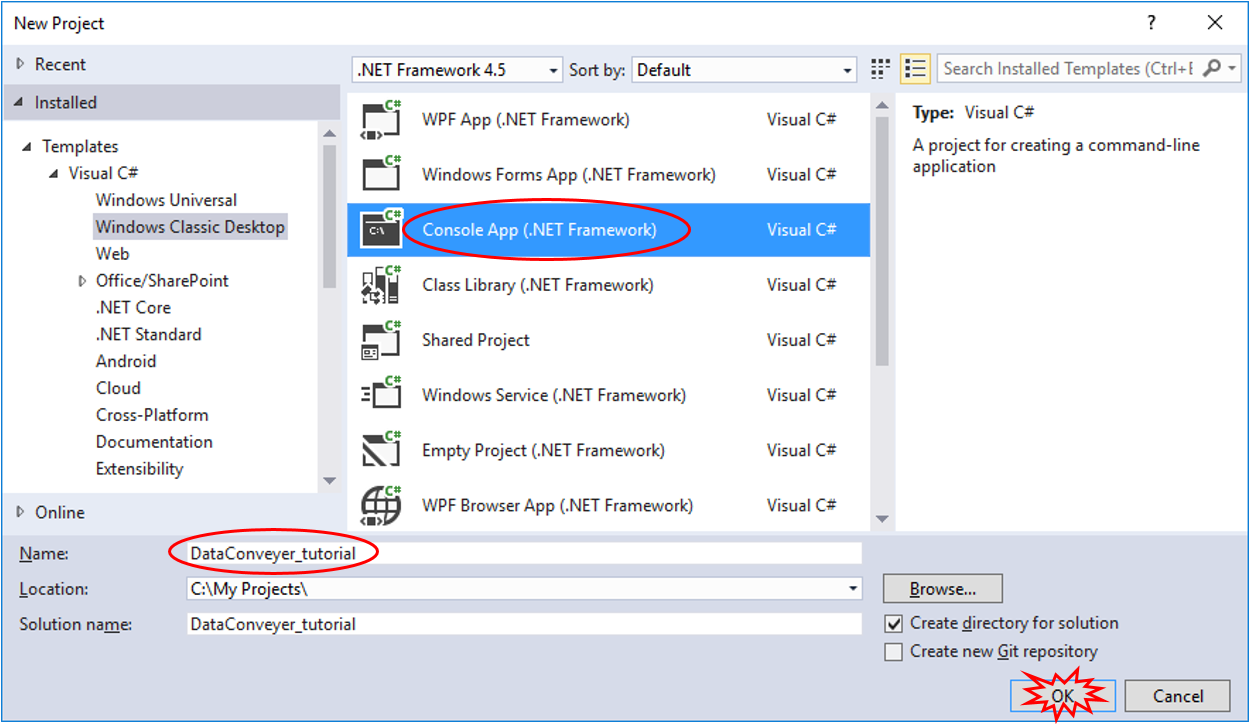
Step 1.4 Click OK to create the project.
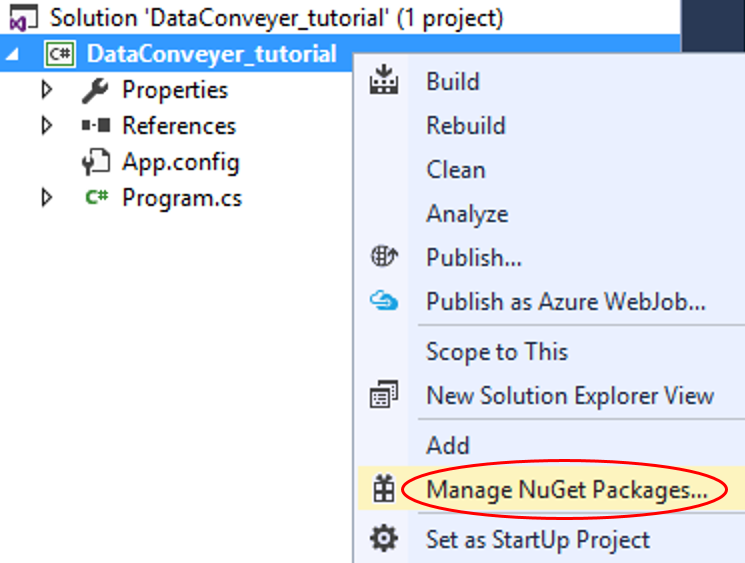
Step 1.5 In the Solution Explorer, right-click on the DataConveyer_tutorial project and select Manage NuGet Packages… from the pop-up menu:
Step 1.6 In the NuGet Package Manager Window, locate the DataConveyer package, e.g. by typing dataconveyer into the search box (make sure Browse tab is selected and the Package source is set to nuget.org):
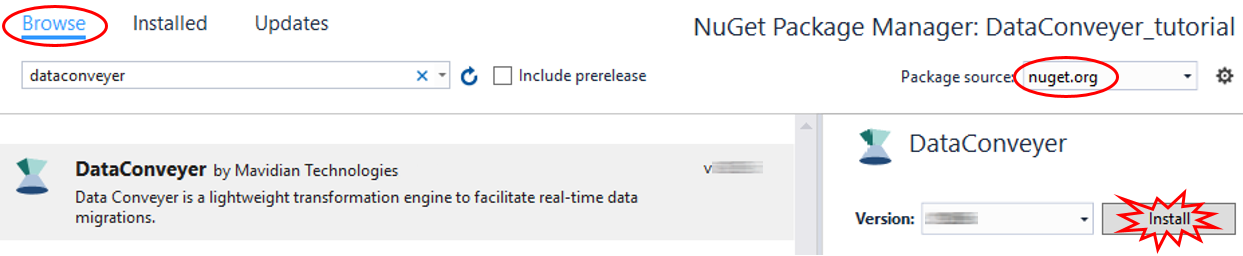
Step 1.7 Click on the Install button and follow the prompts to complete the package installation process. Verify successful installation by locating a “Successfully installed ‘DataConveyer …” message in the Package Manager output or a green checkmark next to the Data Conveyer logo:

Step 1.8 Click on Program.cs in the Solution Explorer window, then add these using directives to the top of the Program class:
using Mavidian.DataConveyer.Common;
using Mavidian.DataConveyer.Orchestrators;
Step 1.9 Add the following code into the Main method of the Program class:
Console.WriteLine("Data Conveyer process is starting");

//Configure Data Conveyer process:
var config = new OrchestratorConfig()
{
   InputDataKind = KindOfTextData.Delimited,
   InputFileName = "input.csv",
   HeadersInFirstInputRow = true,
   OutputDataKind = KindOfTextData.Keyword,
   OutputFileName = "output.kw"
};

//Execute Data Conveyer process:
ProcessResult result;
using (var orchtr = OrchestratorCreator.GetEtlOrchestrator(config))
{
   result = orchtr.ExecuteAsync().Result; //wait for completion, i.e. synchronous execution
}

//Evaluate completion status:
switch (result.CompletionStatus)
{
   case CompletionStatus.IntakeDepleted:
   Console.WriteLine($"Successfully processed {result.RowsWritten.ToString()} records");
   break;
   case CompletionStatus.InitializationError:
   Console.WriteLine("Oops! Initialization error - maybe the input file is missing(?)");
   break;
   default:
   Console.WriteLine($"Oops! Processing resulted in unexpected status of " + result.CompletionStatus.ToString());
   break;
}

Console.Write("Press any key to exit...");
Console.ReadKey();
Step 1.10 Select Debug → Start Debugging (F5) to build and execute the project. The following window should appear:

Indeed, we don’t have the input file for Data Conveyer to process. Hit any key to dismiss the window.
Step 1.11 Add the input file (input.csv) into the location of our executable, i.e. the build output (typically, the bin\Debug\ subfolder of the project). A sample input.csv file can be obtained from the Data subfolder of the tutorial repository.
It’s easy to get this step wrong, so be careful. Here are some hints:
If you navigate directly to the Data folder of the tutorial repository, then make sure to only obtain raw csv data without any html markup (so, attempting to copy the file link will not work). It may be easiest to download archive of the repository and then extract the input.csv file from the Data subfolder.
Data Conveyer expects the input.csv file to be at the exact location specified by the InputDataFile parameter. Since we specified the name of the file (“input.csv”) without any path, the file needs to be placed in the same folder as the DataConveyer.dll executable, i.e. the build output location (such as the bin\Debug\ subfolder of the project). Alternatively, we can choose another location by includin path information (relative or absolute) in the InputDataFile parameter value. For example,
InputDataFile = "MyInputData\input.csv"would cause Data Conveyer to read input.csv file from a MyInputData subfolder of the executable location (such as the bin\Debug\Data subfolder).
Step 1.12 Select Debug → Start Debugging (F5) to execute the project again. This time the output should look like this:

In the event your output looks different (“Oops! …” message), this is likely caused by the location or the contents of the input.csv file. Please refer to the notes in step 1.11 above for corrective actions.
Hit any key to dismiss the command window.
Step 1.13 Notice the newly created output.kw file alongside the input.csv file (in the build output location). Use a text editor, such as Notepad to compare the two files. The files contain the same data, but in different format.
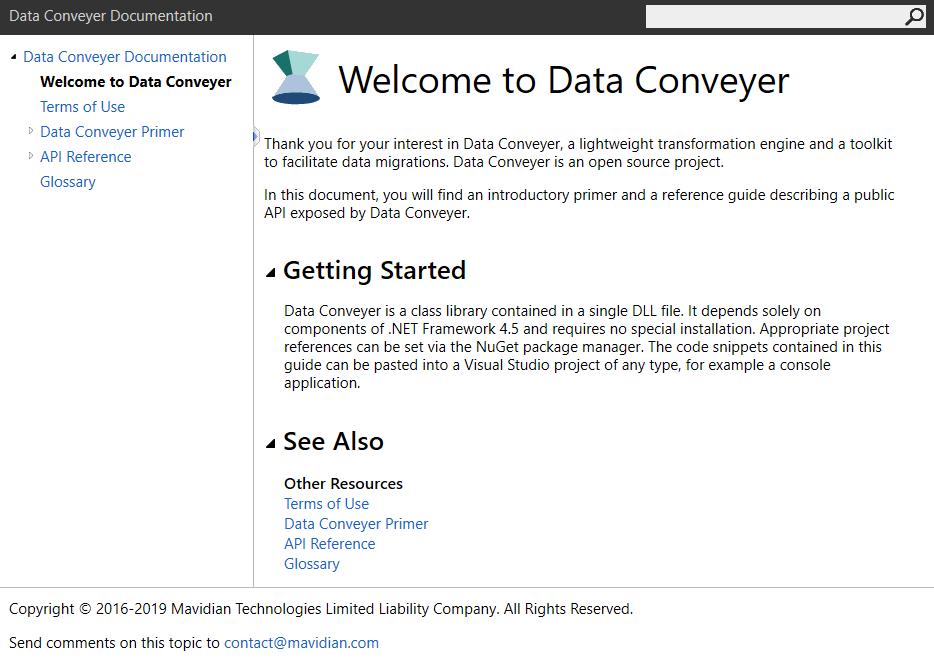
Step 1.14 (Optional) Explore the contents of Data Conveyer Documentation, which contains an introductory guide as well as an API Reference.
End of Lesson 1.
Proceed to Lesson 2: Custom Transformation (~5 mins).